Building a Pi-hole
![]()
Source: Pi-hole homepage
What's a pi-hole?
Shut your pie hole, you've never heard of a pi-hole?
A pi-hole is an answer to the "web pages are detecting ad blockers more and more, but I don't have an interest in invasive ads". The short version is that a pi-hole is basically a little server that redirects ad-traffic into an abyss.
The slightly longer version is that an adblocker, like the well known Adblock Plus, operates on the page before it is rendered using filter lists. Typically, the filter lists are regex[Regex Tutorial],[Another Tutorial] rules that tell the blocker what to remove from the page. The ad content is then removed from the page and the altered content is displayed. One way that websites can detect that the page content is altered is basically to add some Javascript to their page and check that if the ad sections are still present. When they aren't, the site can do fun things like "Hey, I see you're using an adblocker! Please disable your adblocker to view our content."
What the pi-hole does is different. The pi-hole doesn't alter the page content, what it does is redirect the requests for the ads and basically fakes an outage. In the interest of not losing customers during a legit ad outage (which probably happens more than many realize), content is still rendered during an outage. So when you use the pi-hole your desired content still renders, ad-free. Basically the pi-hole is a Man in the Middle (MitM) DNS proxy, if you wanted to Google for more info about the "how".
For more information about the project, please head over to either their web page or their Github page and take a look at their wonderful 1.5 minute video and README.
Quick statement about ads
I just wanted to take a quick moment to make a statement about ads themselves. Yes, I realize that ads are a way for some many content providers to make money, but ads are a two way street. I don't object to people making money, I object to increasingly invasive and potentially dangerous1,2,3, 4 ads. Content providers need to find a secure way to use safe ads (and not overwhelm their visitors) if they want their customerbase to stop trying to block them all the time.
Anyway.
Getting the Pi's OS on the SD Card
I have a Raspberry Pi 3, so I decided to install Ubuntu 16.04 for the Pi 3. To do this, I downloaded the OS onto my Mac and installed it onto the SD card like so:
==[]=[ 18:50 ]=[  quinn@FingerSkillet  ]=[ ~     ]=[]==
$ diskutil list
/dev/disk0 (internal, physical):
   #:                       TYPE NAME                    SIZE       IDENTIFIER
   0:      GUID_partition_scheme                        *500.3 GB   disk0
   1:                        EFI EFI                     209.7 MB   disk0s1
   2:          Apple_CoreStorage Macintosh HD            499.4 GB   disk0s2
   3:                 Apple_Boot Recovery HD             650.0 MB   disk0s3

/dev/disk1 (internal, virtual):
   #:                       TYPE NAME                    SIZE       IDENTIFIER
   0:                            Macintosh HD           +499.1 GB   disk1

/dev/disk2 (external, physical):
   #:                       TYPE NAME                    SIZE       IDENTIFIER
   0:     FDisk_partition_scheme                        *7.7 GB     disk2
   1:             Windows_FAT_32 boot                    58.7 MB    disk2s1
   2:                      Linux                         7.7 GB     disk2s2

==[]=[ 18:53 ]=[  quinn@FingerSkillet  ]=[ ~     ]=[]==
$ diskutil unmountDisk /dev/disk2
Unmount of all volumes on disk2 was successful
==[]=[ 18:53 ]=[  quinn@FingerSkillet  ]=[ ~     ]=[]==
$ unxz -k ubuntu-16.04-preinstalled-server-armhf+raspi3.img.xz
==[]=[ 18:53 ]=[  quinn@FingerSkillet  ]=[ ~     ]=[]==
$ sudo dd bs=1m if=ubuntu-16.04-preinstalled-server-armhf+raspi3.img of=/dev/rdisk2
Password:
3814+1 records in
3814+1 records out
4000000000 bytes transferred in 793.593475 secs (5040364 bytes/sec)
==[]=[ 19:07 ]=[  quinn@FingerSkillet  ]=[ ~     ]=[]==
Command-line review:
diskutil- Since I have a Mac, this is the command line utility that allows me to list, format, etc. the attached disks. I had the SD card in a USB stick attached to the Mac and needed to get the disk's # and unmount it before writing the image.rdiskstands for RAW disk.unxz- Decompresses the*.img.xzfile. The-kflag keeps the original.xzfile, without it the original will be deleted once it has been decompressed.dd- Theddcommand copies and converts a file. In this case, we are telling the command to copy the image file in1m(1 megabyte) sections over to the SD card (rdisk2). Specifying the "chunk size" ("byte size") is supposed to help speed up the copy if done correctly, although I'll admit that for this blog post I haven't tested that. I may do so later though.
Now that the OS is on the SD card, unmount it and plug it into the Pi. Depending on how you set up your Pi, you may want/need to have a keyboard and monitor ready to connect.
Updating Ubuntu
By default the username and password are both ubuntu. When I set the original password I actually chose something quite weak so that I could easily ssh in from my Mac, add my SSH key to the ~/.ssh/authorized_hosts file, and then changed the password to something much, much stronger. It's easier to set a random, strong password when you can copy and paste, yeah?
ubuntu@ubuntu:~$ passwd
Changing password for ubuntu.
(current) UNIX password:
Enter new UNIX password:
Retype new UNIX password:
passwd: password updated successfully

ubuntu@ubuntu:~$ sudo apt-get update
Get:1 http://ppa.launchpad.net/ubuntu-raspi2/ppa-rpi3/ubuntu xenial InRelease [18.1 kB]
Hit:2 http://ports.ubuntu.com/ubuntu-ports xenial InRelease
Get:3 http://ports.ubuntu.com/ubuntu-ports xenial-updates InRelease [102 kB]
Get:4 http://ports.ubuntu.com/ubuntu-ports xenial-backports InRelease [102 kB]
...
Reading package lists... Done

ubuntu@ubuntu:~$ sudo apt-get upgrade -y
Reading package lists... Done
Building dependency tree
Reading state information... Done
Calculating upgrade... Done
...
Generating boot script u-boot image... done.
Taking backup of boot.scr.
Installing new boot.scr.
ubuntu@ubuntu:~$
Note that update just updates the package list and upgrade actually upgrades the installed packages, so the latter took much longer than the former. Long enough for me to pop non-microwave popcorn for movie night and start the movie. Be ready.

Source: Found on Popcorn Time
Setting up the Pi-hole software
Running the install puts you through a series of prompts. I just used the defaults.
ubuntu@ubuntu:~$ curl -L install.pi-hole.net | bash
  % Total    % Received % Xferd  Average Speed   Time    Time     Time  Current
                                 Dload  Upload   Total   Spent    Left  Speed
  0     0    0     0    0     0      0      0 --:--:-- --:--:-- --:--:--     0
100 46743  100 46743    0     0  29458      0  0:00:01  0:00:01 --:--:--  111k
:::
::: Script called with non-root privileges. The Pi-hole installs server packages and configures
::: system networking, it requires elevated rights. Please check the contents of the script for
::: any concerns with this requirement. Please be sure to download this script from a trusted source.
:::
::: Detecting the presence of the sudo utility for continuation of this install...
::: Utility sudo located.
:::
::: You are root.
::: Verifying free disk space...
:::
::: Updating local cache of available packages... done!
:::
::: Checking apt-get for upgraded packages.... done!
:::
::: Your system is up to date! Continuing with Pi-hole installation...
:::    Checking for apt-utils... installed!
:::    Checking for debconf... installed!
:::    Checking for dhcpcd5... added to install list!
:::    Checking for git... installed!
:::    Checking for iproute2... installed!
:::    Checking for whiptail... installed!
:::
::: Stopping dnsmasq service... done.
:::
::: Stopping lighttpd service... done.
::: Using Google DNS servers.
:::
::: Setting IP to ██.██.██.██/24.  You may need to restart after the install is complete.
:::
::: IPv4 address: ██.██.██.██/24
::: IPv6 address:
::: Web Interface On.
::: Logging On.
:::
::: Checking for existing repository...
:::    Cloning https://github.com/pi-hole/pi-hole.git into /etc/.pihole... done!
 done!
:::
::: Checking for existing repository...
:::    Cloning https://github.com/pi-hole/AdminLTE.git into /var/www/html/admin...
...
::: If you set a new IP address, you should restart the Pi.
::: View the web interface at http://pi.hole/admin or http://██.██.██.██/admin
:::
::: Note: As security measure a password has been installed for your web interface
::: The currently set password is
:::                                █████████
:::
::: You can always change it using
:::                                pihole -a -p new_password
:::
::: The install log is located at: /etc/pihole/install.log
Open up the admin console and:
Now put the Pi-hole IP address as the DNS server in your devices. Since I use my Macbook in other locations, I did the following:
- Go to System Prefernces -> Network
- At the top: Location -> Edit Locations
- Hilight Automatic, click the gear, choose Duplicate Location, and name the new location something meaningful. I chose pi-hole.
- Under Wi-Fi go to Advanced -> DNS, put the pi-hole's IP address in as the DNS Server, and then click Ok and Apply.
Done! Now I can use Automatic when I'm not home and pi-hole when I am! Easy :)
Let's check out the adblocking action.
I went to a site that I knew had previously detected my Adblock Plus and that had at least a few ads to show, and take a look:
 |
 |
| Without pi-hole | With pi-hole |
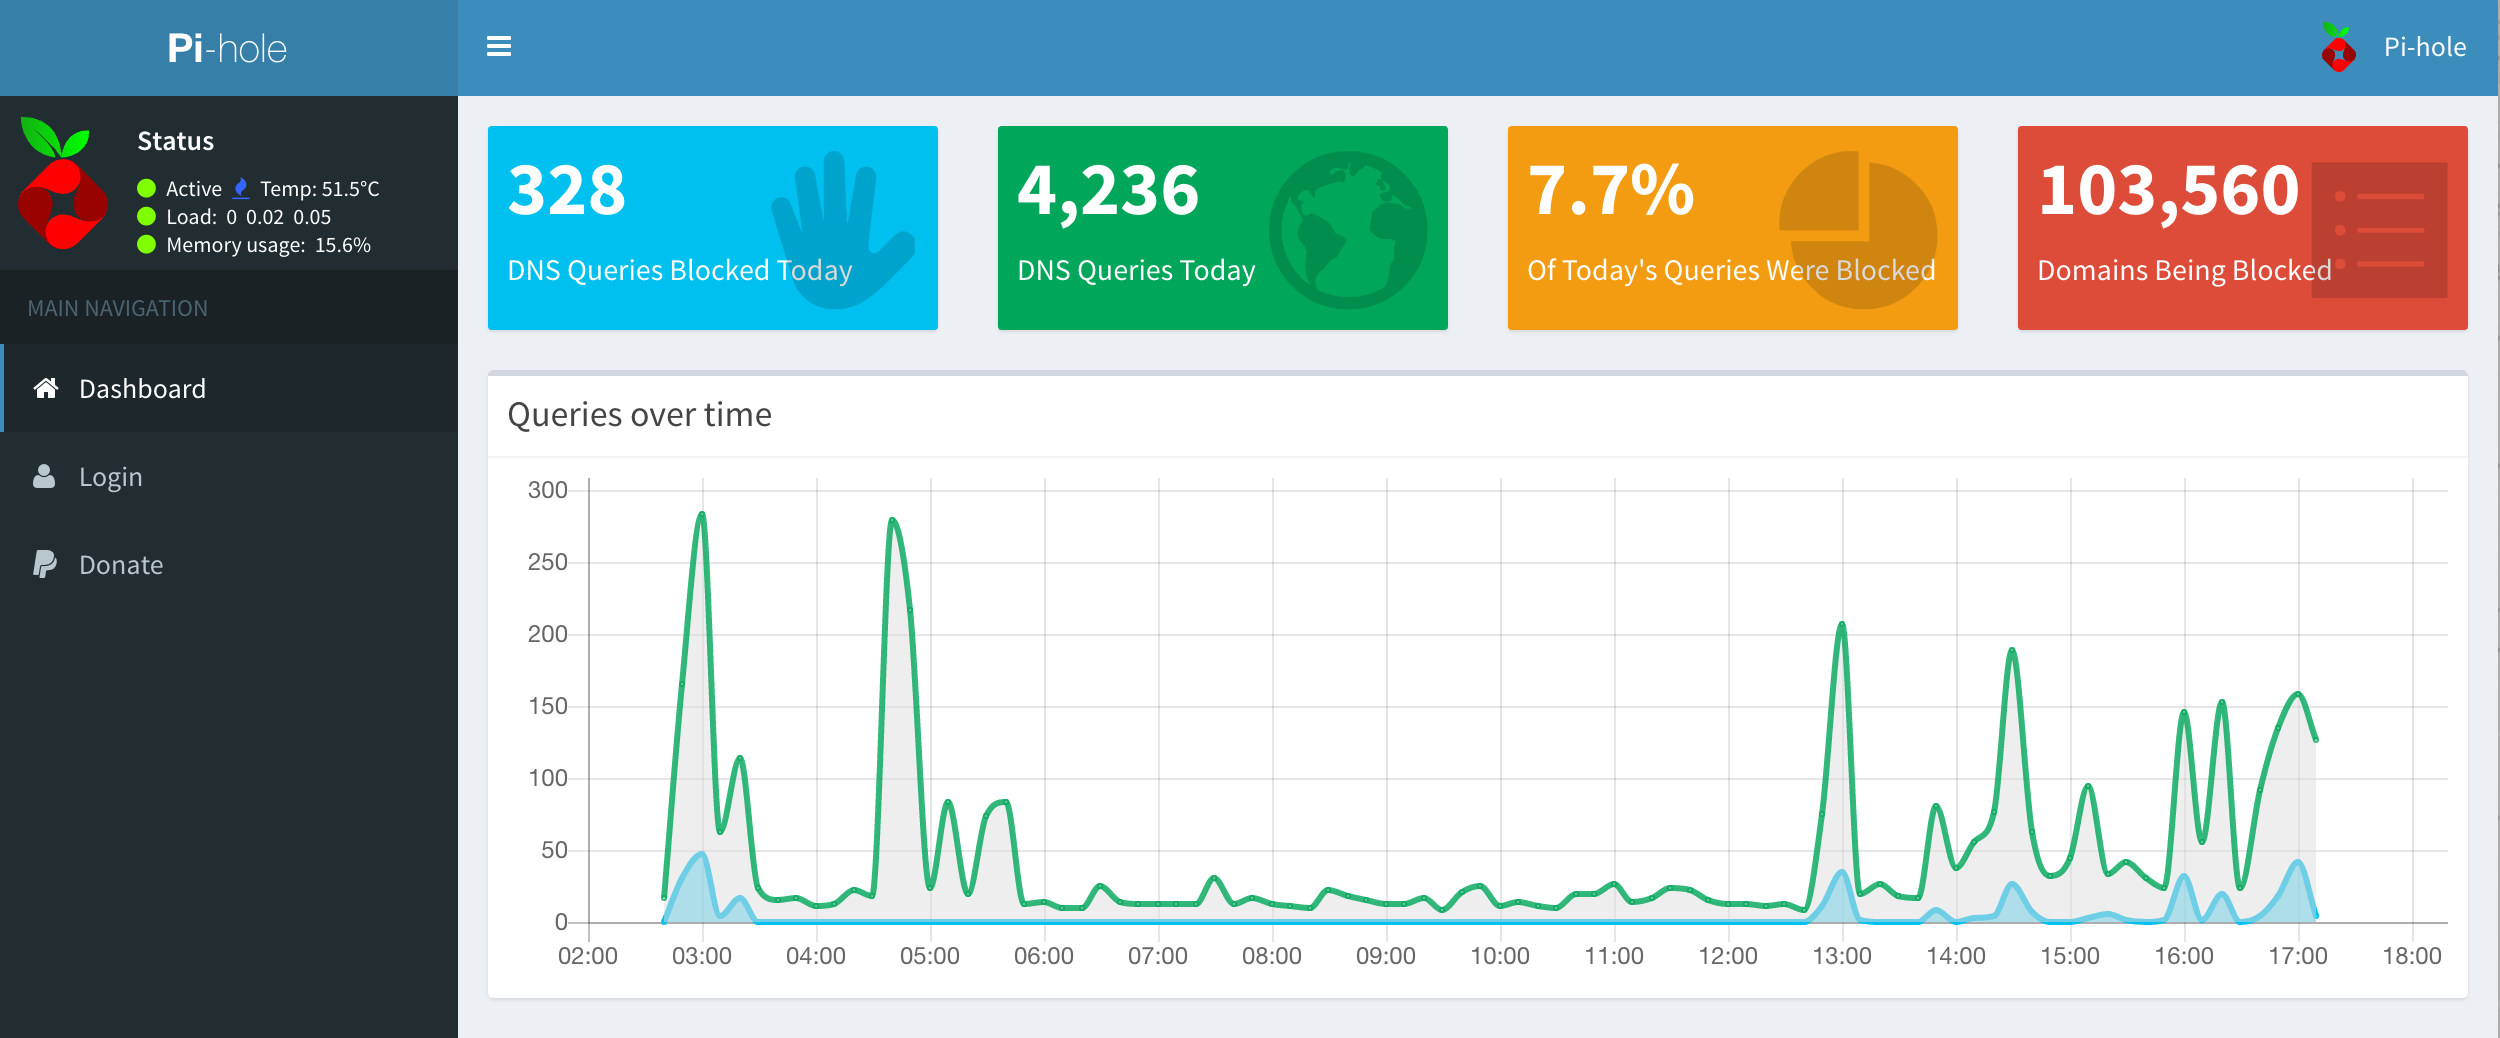
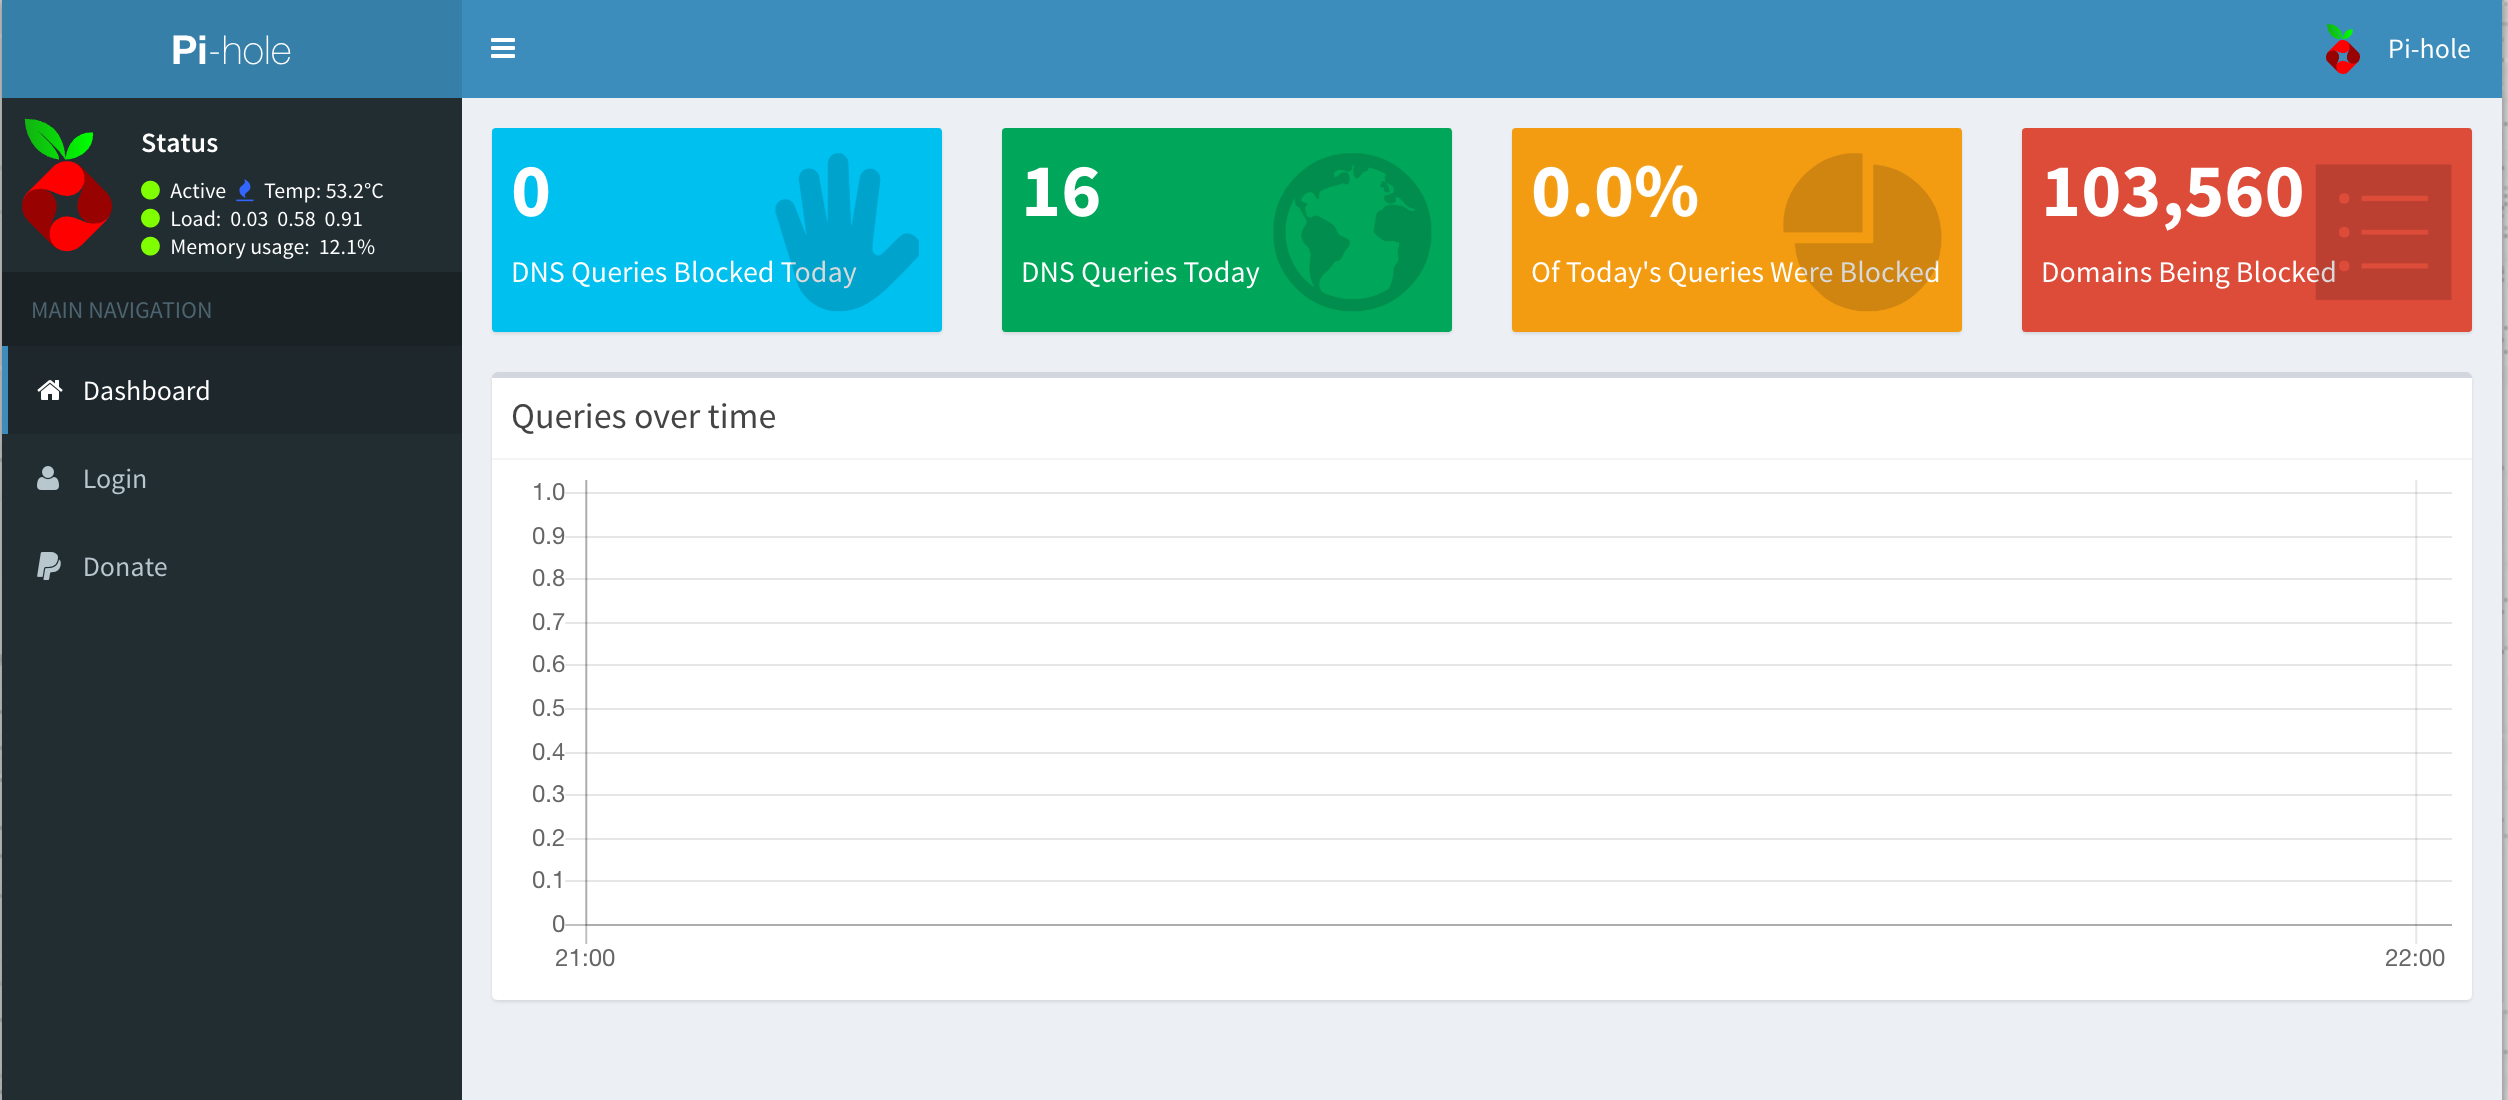
And the counters showing up on the dashboard:
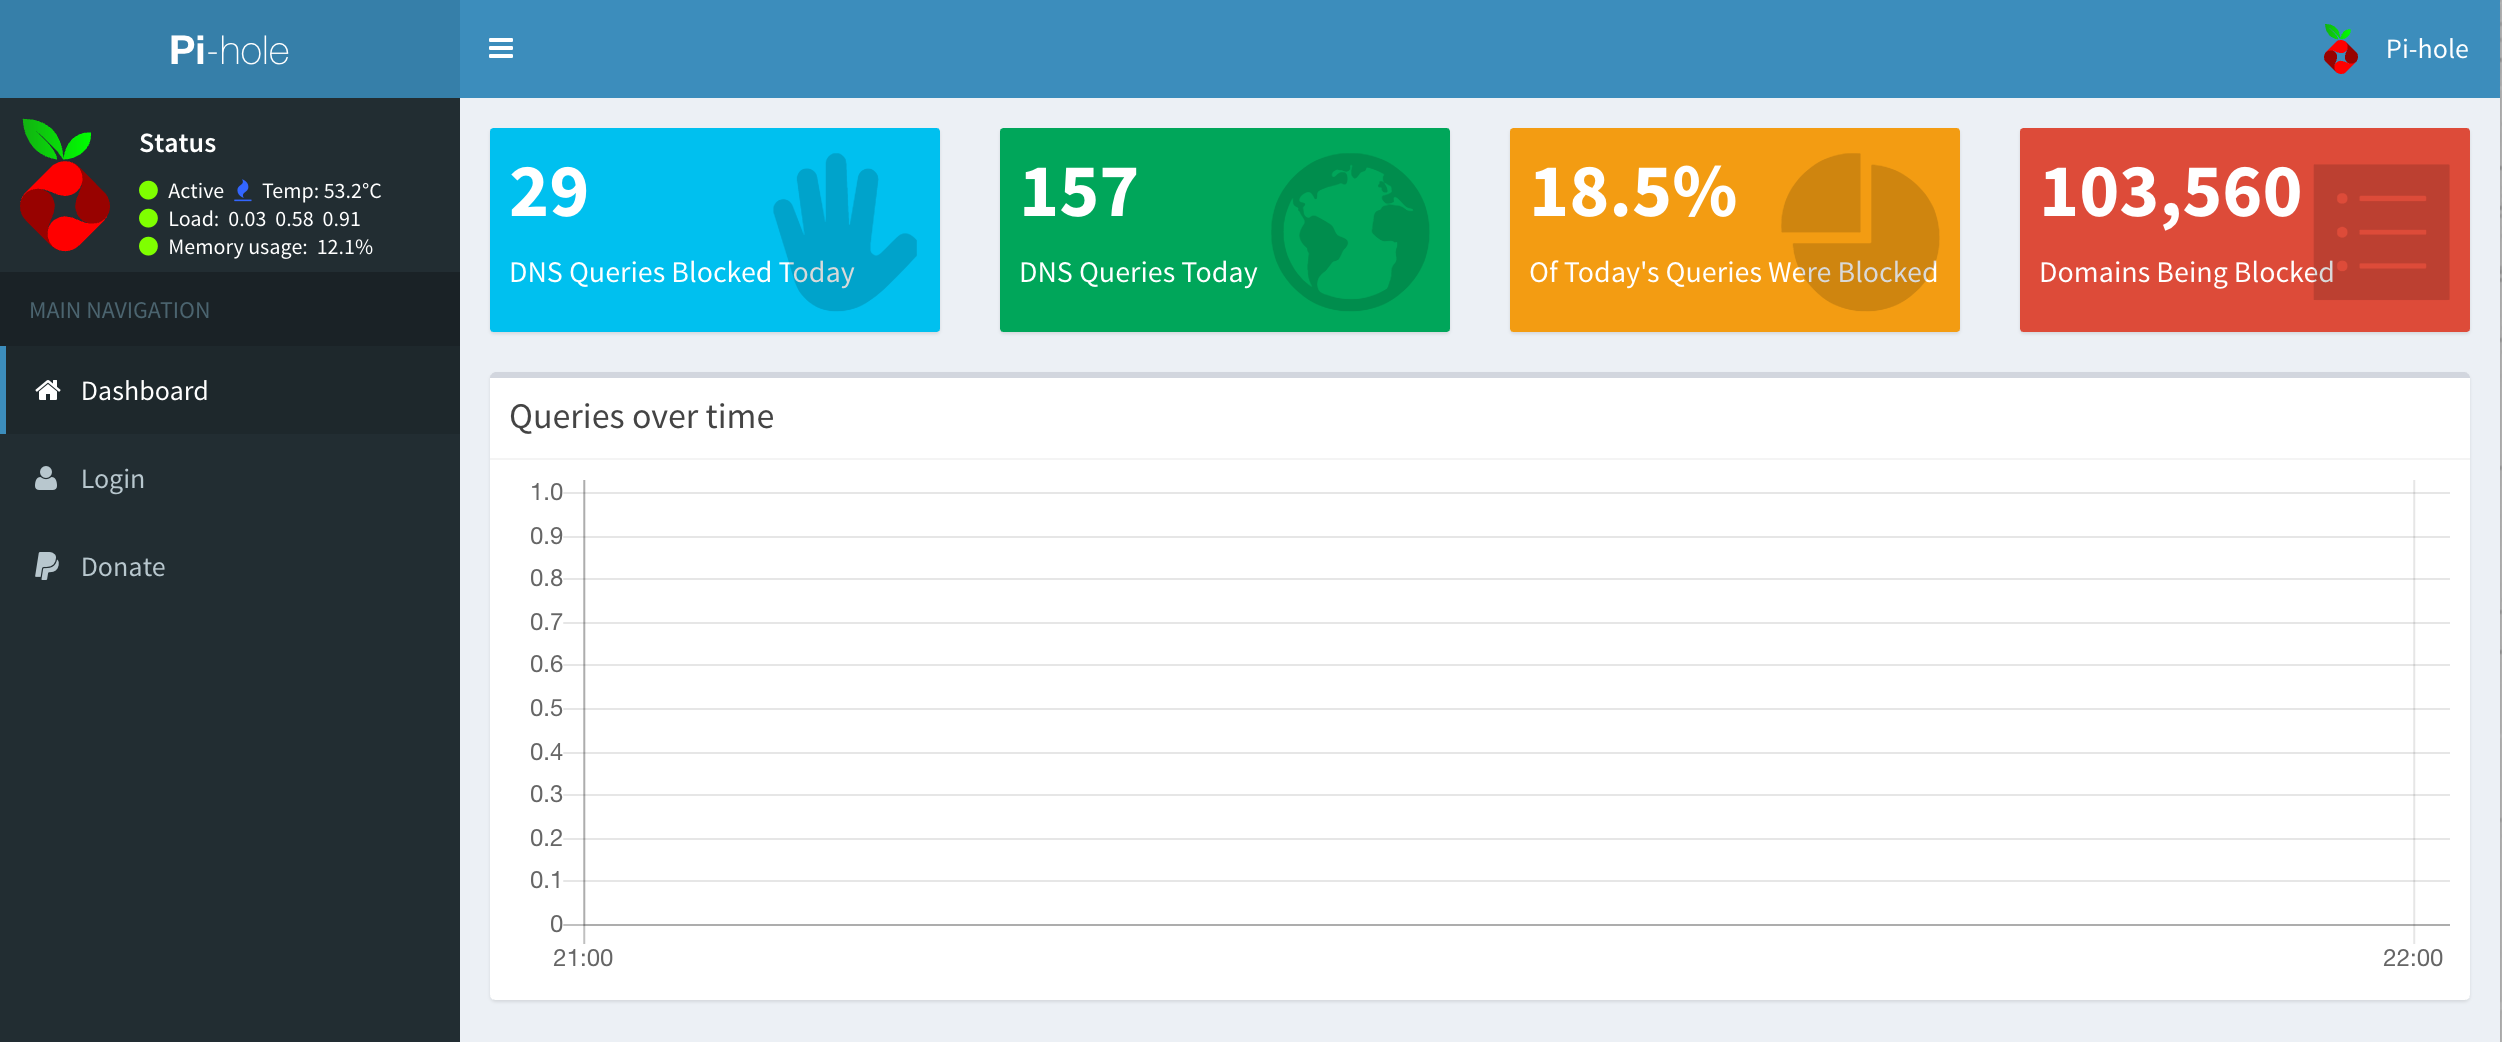
(Those numbers are on a steep climb already!)
Update: After about 12h of pi-hole usage, this is what the dashboard looks like: