Running macOS in Vagrant
Well Holy Hannah, I received my first Twitter DM over a blog post I've written. I'm officially a pro now 🧐
The DM was from a user that was having some issues with the instructions I provided on a post I wrote in 2015 for S&W here about how to run the then-current release of macOS inside a Vagrant box.
So I thought, what the heck that blog post is 2 yrs old and in computer time that's pratically middle aged. And Trump's been president for essentially a full year now and let's not even talk about what that's done to the flow of time.

Source: Space.com article, here. Article credits NASA/JPL-CalTech.
tldr - it's worth revisiting, Me Said To Me

Laptop Specs
- 15" 2015 Macbook Pro
- 16 GB of RAM
- 2.8 GHz CPU
- 1 TB SSD
- macOS High Sierra, 10.13.2
Downloads
- macOS High Sierra from the App Store
- Image is approximately 5.2 GB
- latest Vagrant from Hashicorp
- As of this post the latest release is 2.0.1
- Image is approximately 70 MB
- latest release of VirtualBox from Oracle
- As of this post the latest release is 5.2.2
- Image is approximately 93 MB
- Homebrew - a package installer for macOS. Not required but recommended / encouraged.
- iTerm - an alternative to the Terminal app included in macOS. Again, not required but recommended. For the rest of this post "terminal" can be used interchangeably for iTerm or Terminal, whichever you chose.
Protip: you can install Vagrant and VirtualBox using Homebrew:
- Open terminal
- Install Homebrew (
brew) using the command provided on the link above - Install Vagrant
brew cask install vagrant - Install VirtualBox
brew cask install virtualbox
The main benefit of using a package installer like this is that your packages, like Vagrant and VirtualBox, can now be kept updated with brew update rather than manually downloading / updating package installers from various websites.
For the VirtualBox install you will be prompted to open System Preferences → Security & Privacy at some point. If you don't do this "fast enough" (by the system's pre-programmed determination) then the install may error out. Fear not! It caches the install like so:
The incomplete download is cached at /Users/quintessence/Library/Caches/Homebrew/Cask/virtualbox--5.2.2-119230.dmg.incomplete
So if the install halts for this reason, or because Connection reset by peer (typically that means slow internet connection), or for any other reason, then you can just hit the up arrow to re-run the last command and hit Enter. Just make sure you fix whatever it asks you to first 😉
What this will essentially look like in terminal:
→  brew cask install vagrant
==> Satisfying dependencies
==> Downloading https://releases.hashicorp.com/vagrant/2.0.1/vagrant_2.0.1_x86_64.dmg
######################################################################## 100.0%
==> Verifying checksum for Cask vagrant
==> Installing Cask vagrant
==> Running installer for vagrant; your password may be necessary.
==> Package installers may write to any location; options such as --appdir are ignored.
Password: ██████████████████████████
==> installer: Package name is Vagrant
==> installer: Installing at base path /
==> installer: The install was successful.
🍺  vagrant was successfully installed!

→  brew cask install virtualbox
==> Tapping caskroom/cask
Cloning into '/usr/local/Homebrew/Library/Taps/caskroom/homebrew-cask'...
remote: Counting objects: 3962, done.
remote: Compressing objects: 100% (3928/3928), done.
remote: Total 3962 (delta 38), reused 921 (delta 30), pack-reused 0
Receiving objects: 100% (3962/3962), 1.35 MiB | 9.10 MiB/s, done.
Resolving deltas: 100% (38/38), done.
Tapped 0 formulae (3,971 files, 4.2MB)
==> Creating Caskroom at /usr/local/Caskroom
==> We'll set permissions properly so we won't need sudo in the future
Password:
==> Caveats
To install and/or use virtualbox you may need to enable their kernel extension in

  System Preferences → Security & Privacy → General

For more information refer to vendor documentation or the Apple Technical Note:

  https://developer.apple.com/library/content/technotes/tn2459/_index.html

==> Satisfying dependencies
==> Downloading http://download.virtualbox.org/virtualbox/5.2.2/VirtualBox-5.2.2-119230-OSX.dmg
######################################################################## 100.0%
==> Verifying checksum for Cask virtualbox
==> Installing Cask virtualbox
==> Running installer for virtualbox; your password may be necessary.
==> Package installers may write to any location; options such as --appdir are ignored.
Password: ██████████████████████████
==> installer: Package name is Oracle VM VirtualBox
==> installer: Installing at base path /
==> installer: The install failed (The Installer encountered an error that caused the installation to fail. Contact the software manufacturer for assistance.)
==> Purging files for version 5.2.2-119230 of Cask virtualbox
==> installer: Package name is Oracle VM VirtualBox
==> installer: Installing at base path /
==> installer: The install was successful.
🍺  virtualbox was successfully installed!

Documented on my frequently used assets page.
The Gritty Bits
Ok, so now that we have All the Things we need to do ... quite a few steps, actually.
Creating your ISO File
First, when you download High Sierra, or any other macOS release to date, you are downloading the file as a DMG, which is a proprietary Apple disk image format. In order to run macOS in VirtualBox, we'll need to convert the DMG file to a more general format such as an ISO. To do this, we're going to start by converting the installer DMG that we downloaded from the App Store into an image of the full OS, store that in a DMG, and then use a utility called PowerISO to do the final conversion.
If that just read like a paragraph of panic, don't worry! We're going through it step by step.
hdiutil attach /Applications/Install\ macOS\ High\ Sierra.app/Contents/SharedSupport/InstallESD.dmg -noverify -mountpoint /Volumes/HighSierraInstall

hdiutil create -o /tmp/HighSierra.cdr -size 5130m -layout SPUD -fs HFS+J
created: /tmp/HighSierra.cdr.dmg

hdiutil attach /tmp/HighSierra.cdr.dmg -noverify -mountpoint /Volumes/InstallBuild

sudo /Applications/Install\ macOS\ High\ Sierra.app/Contents/Resources/createinstallmedia --volume /Volumes/InstallBuild

mv /tmp/HighSierra.cdr.dmg ~/Desktop/HighSierraToMakeISO.dmg
The output will look like this:
→  hdiutil attach /Applications/Install\ macOS\ High\ Sierra.app/Contents/SharedSupport/InstallESD.dmg -noverify -mountpoint /Volumes/HighSierraInstall
/dev/disk2              GUID_partition_scheme
/dev/disk2s1            EFI
/dev/disk2s2            Apple_HFS                       /Volumes/HighSierraInstall

→  hdiutil create -o /tmp/HighSierra.cdr -size 5130m -layout SPUD -fs HFS+J
created: /tmp/HighSierra.cdr.dmg

→  hdiutil attach /tmp/HighSierra.cdr.dmg -noverify -mountpoint /Volumes/InstallBuild
/dev/disk3              Apple_partition_scheme
/dev/disk3s1            Apple_partition_map
/dev/disk3s2            Apple_HFS                       /Volumes/InstallBuild

→  sudo /Applications/Install\ macOS\ High\ Sierra.app/Contents/Resources/createinstallmedia --volume /Volumes/InstallBuild
Password:
Ready to start.
To continue we need to erase the volume at /Volumes/InstallBuild.
If you wish to continue type (Y) then press return: Y
Erasing Disk: 0%... 10%... 20%... 30%...100%...
Copying installer files to disk...
Copy complete.
Making disk bootable...
Copying boot files...
Failed to copy kernelcache, “prelinkedkernel” couldn’t be copied to “.IABootFiles”.
Done.

→  mv /tmp/HighSierra.cdr.dmg ~/Desktop/HighSierraToMakeISO.dmg
Troubleshooting
What to do if you see the following error:
→  sudo hdiutil attach /Applications/Install\ macOS\ High\ Sierra.app/Contents/SharedSupport/InstallESD.dmg -noverify -mountpoint /Volumes/HighSierraInstall
Password:
hdiutil: attach failed - Resource busy
This most likely means that you've already mounted the InstallESD image. Go into Disk Utility and unmount it:
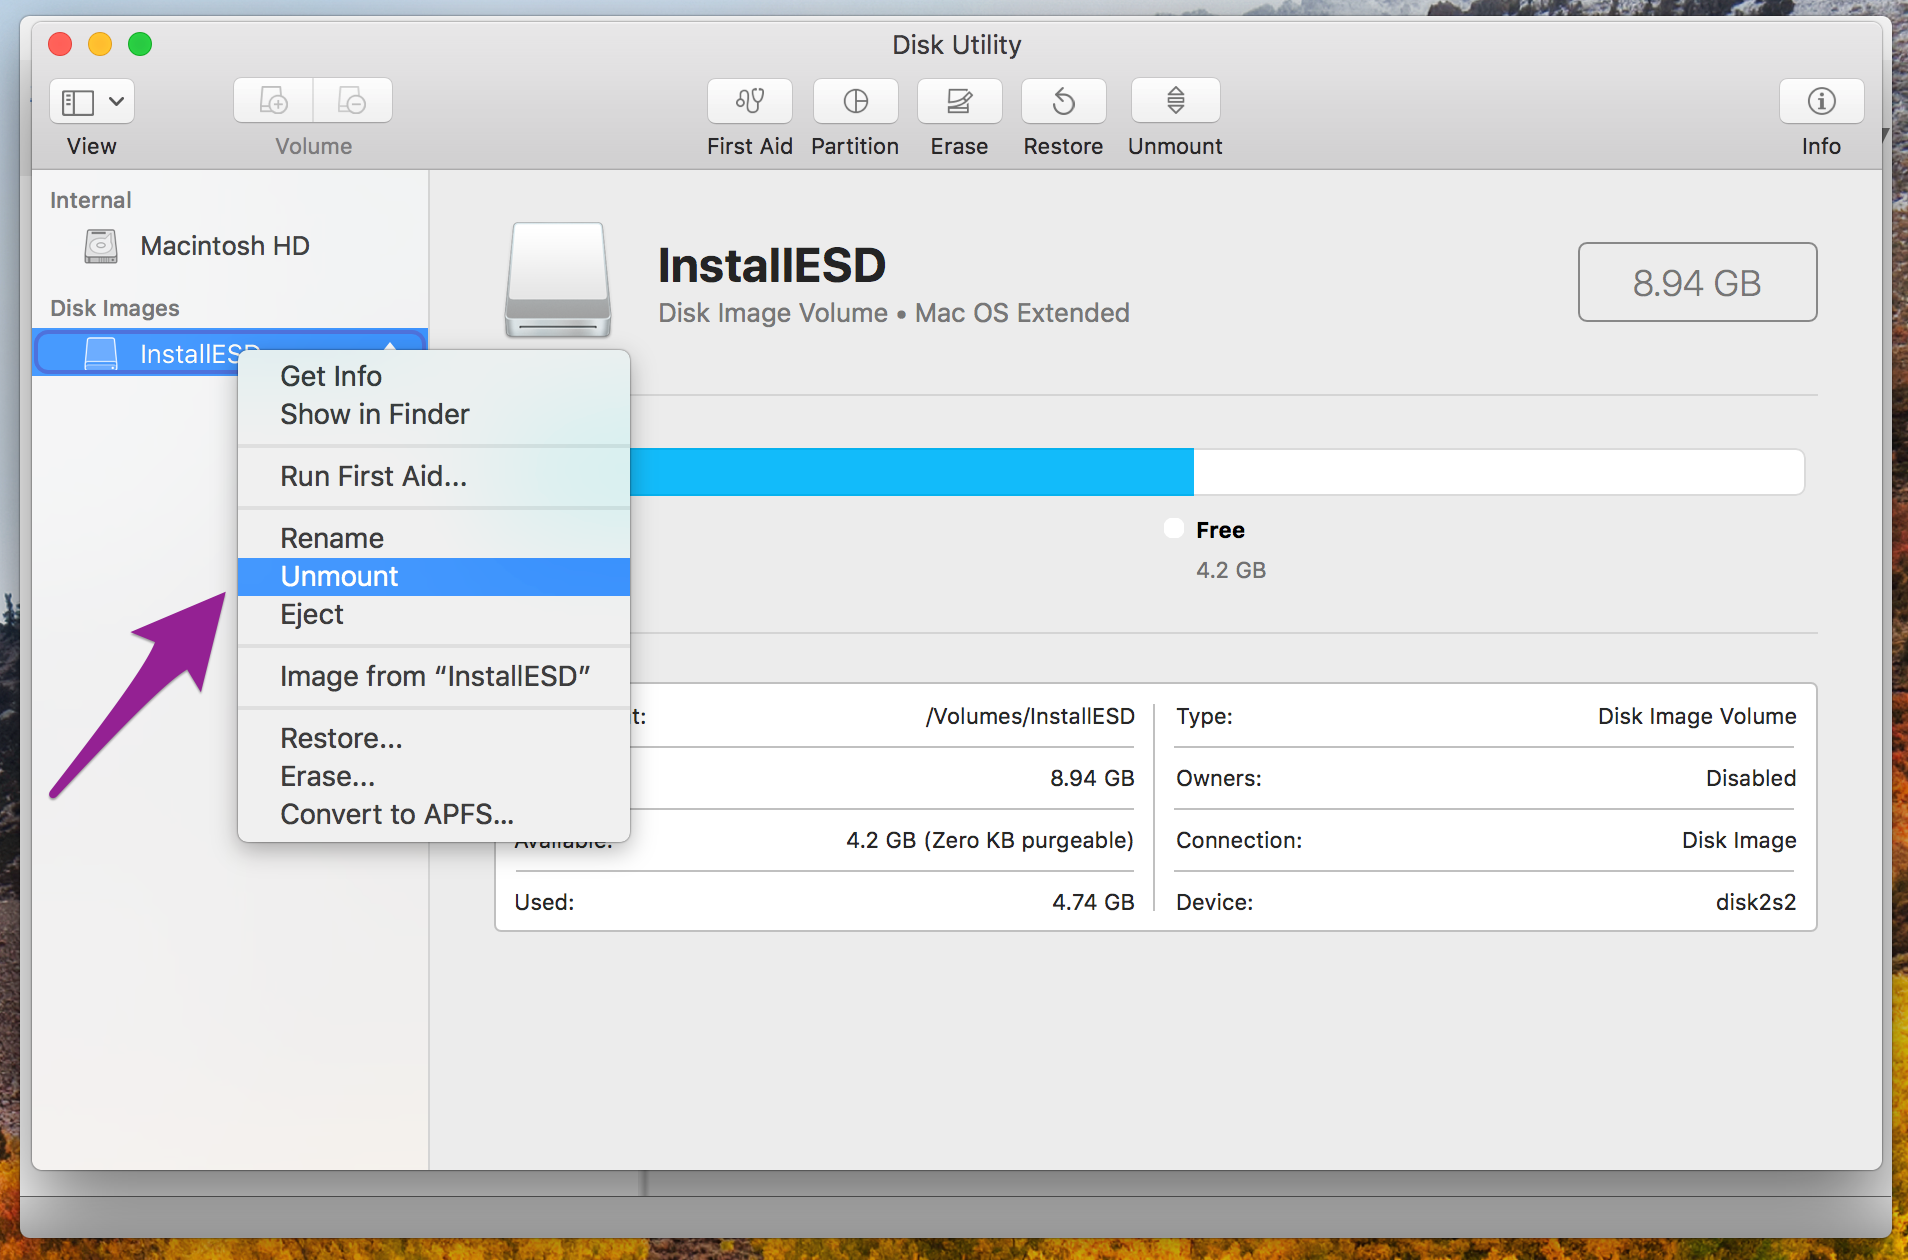
This likely happened when the High Sierra download completed and immediately opened the installer.
Using your VHD file with VirualBox
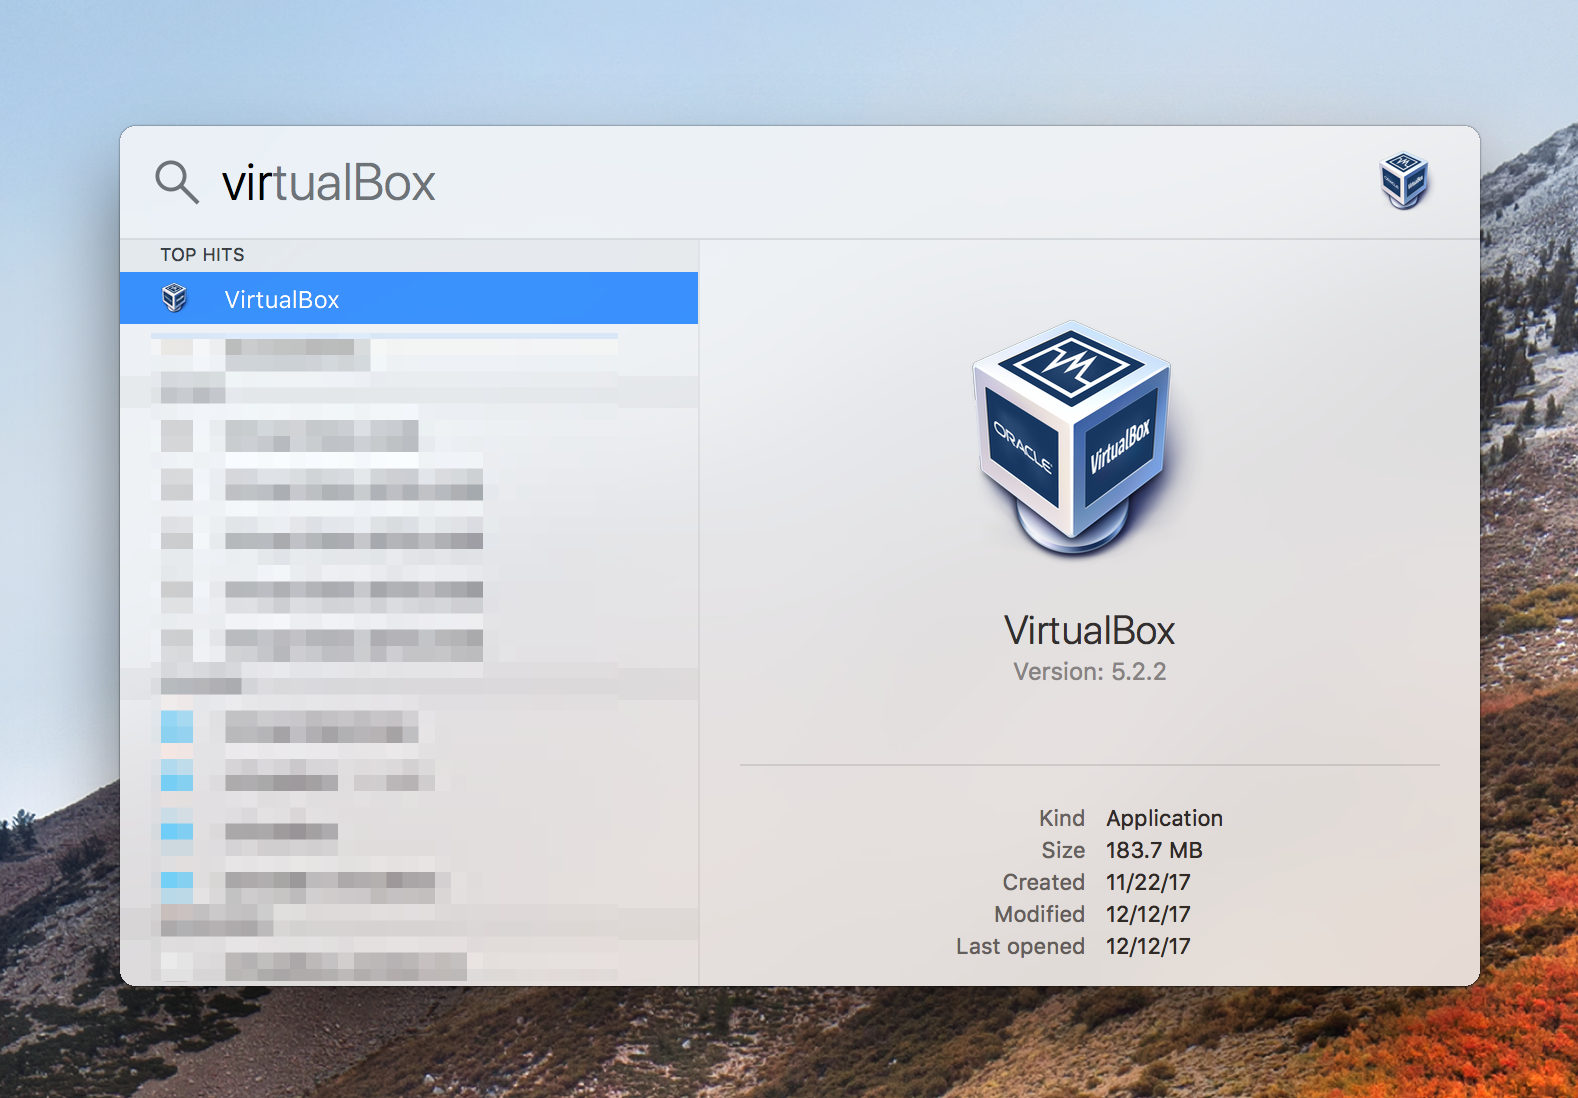
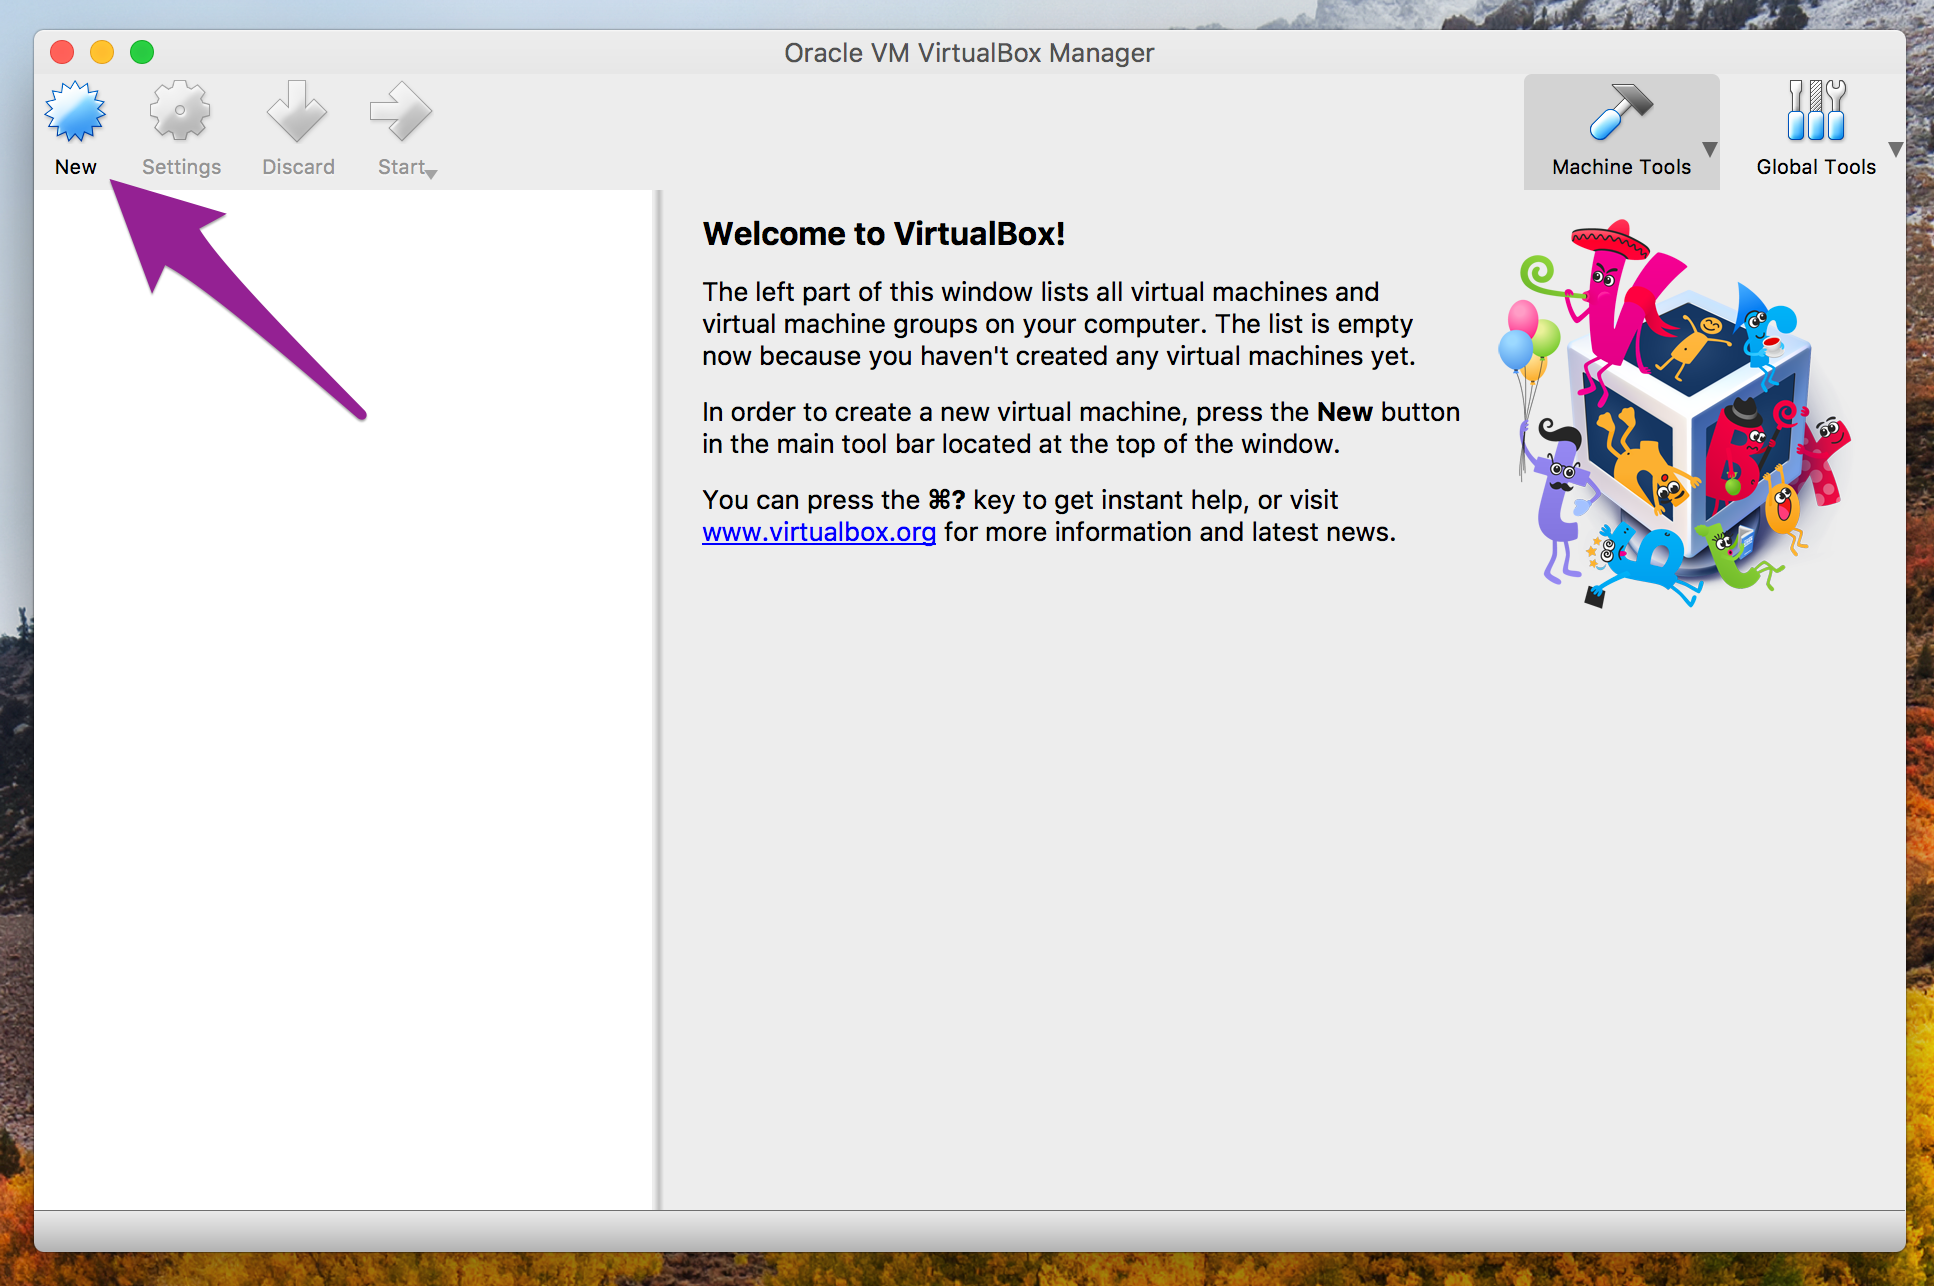
Open VirtualBox:
Click New:
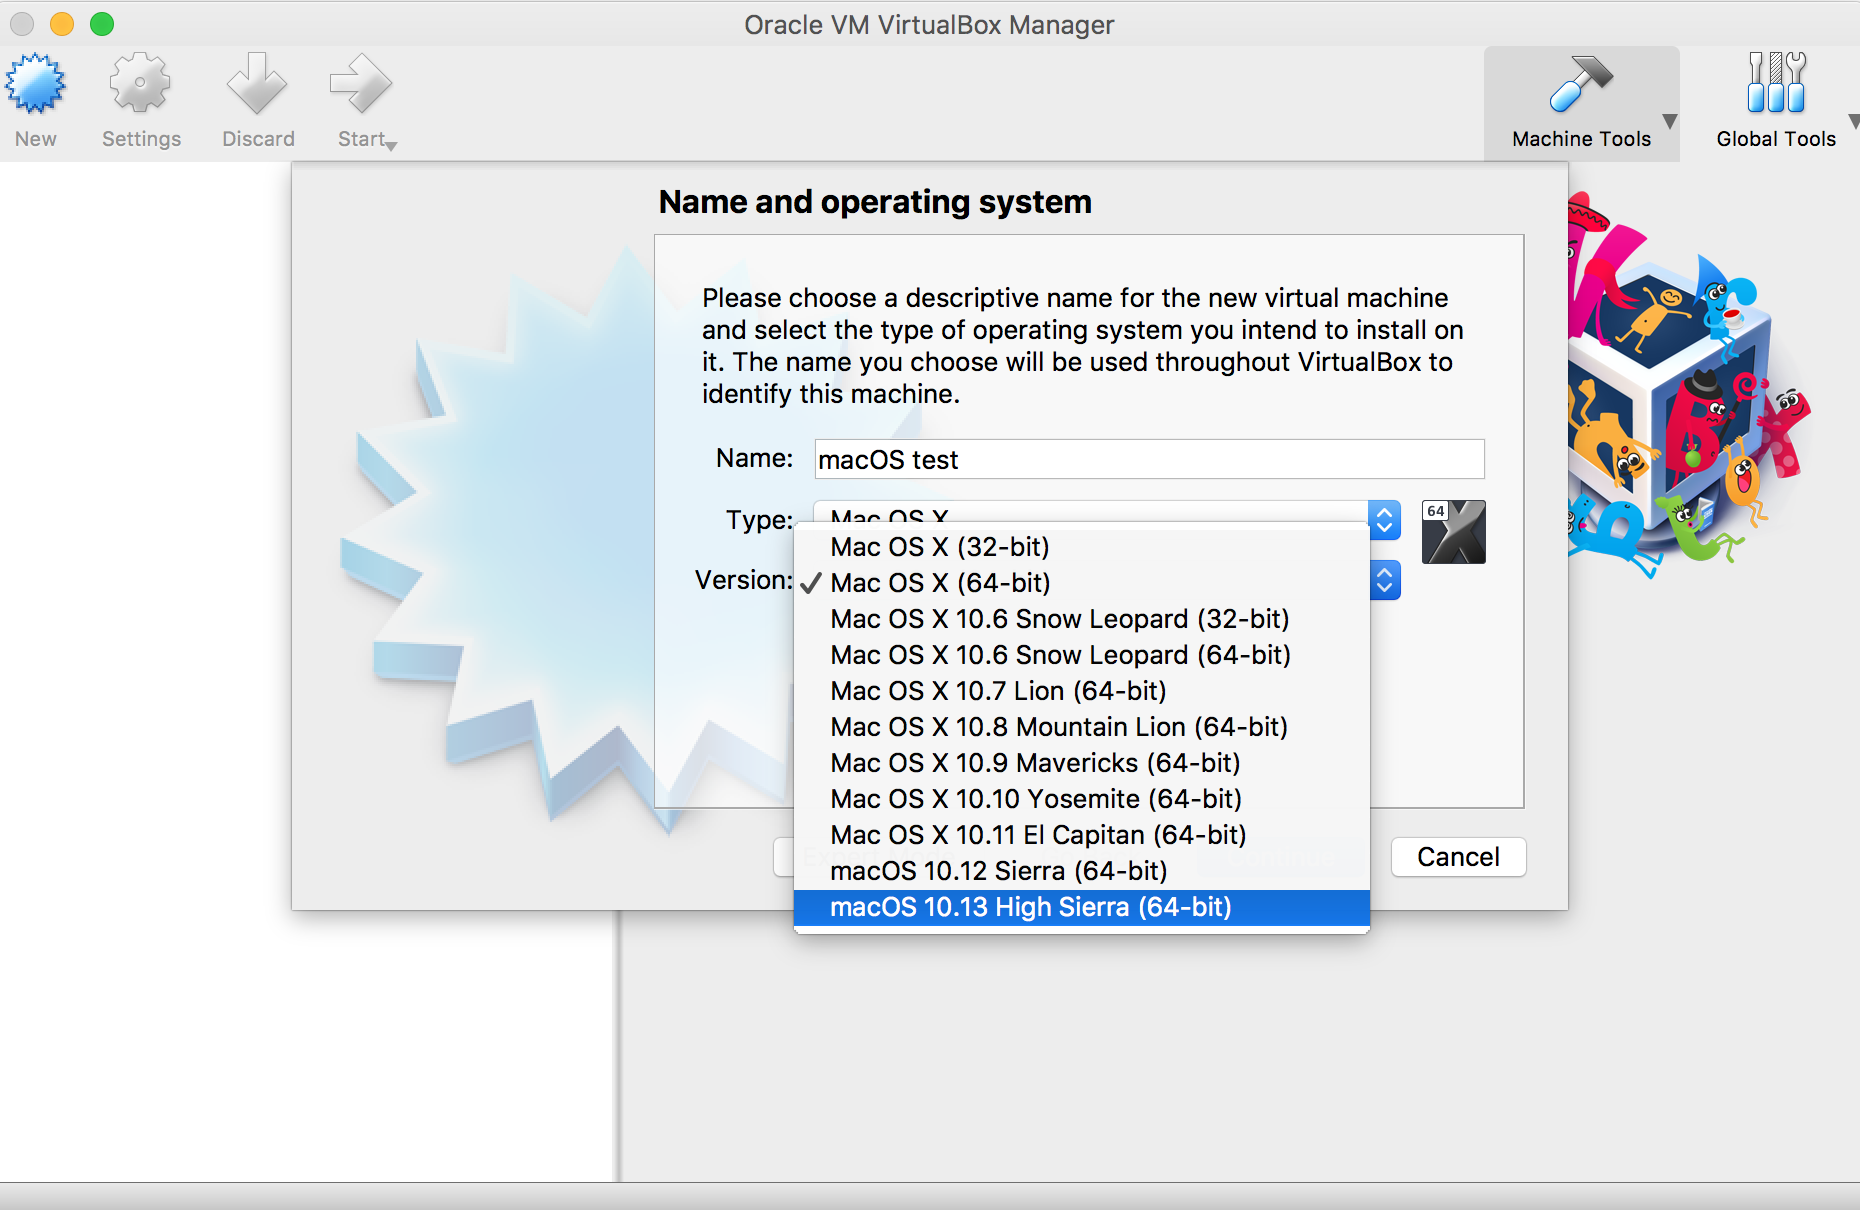
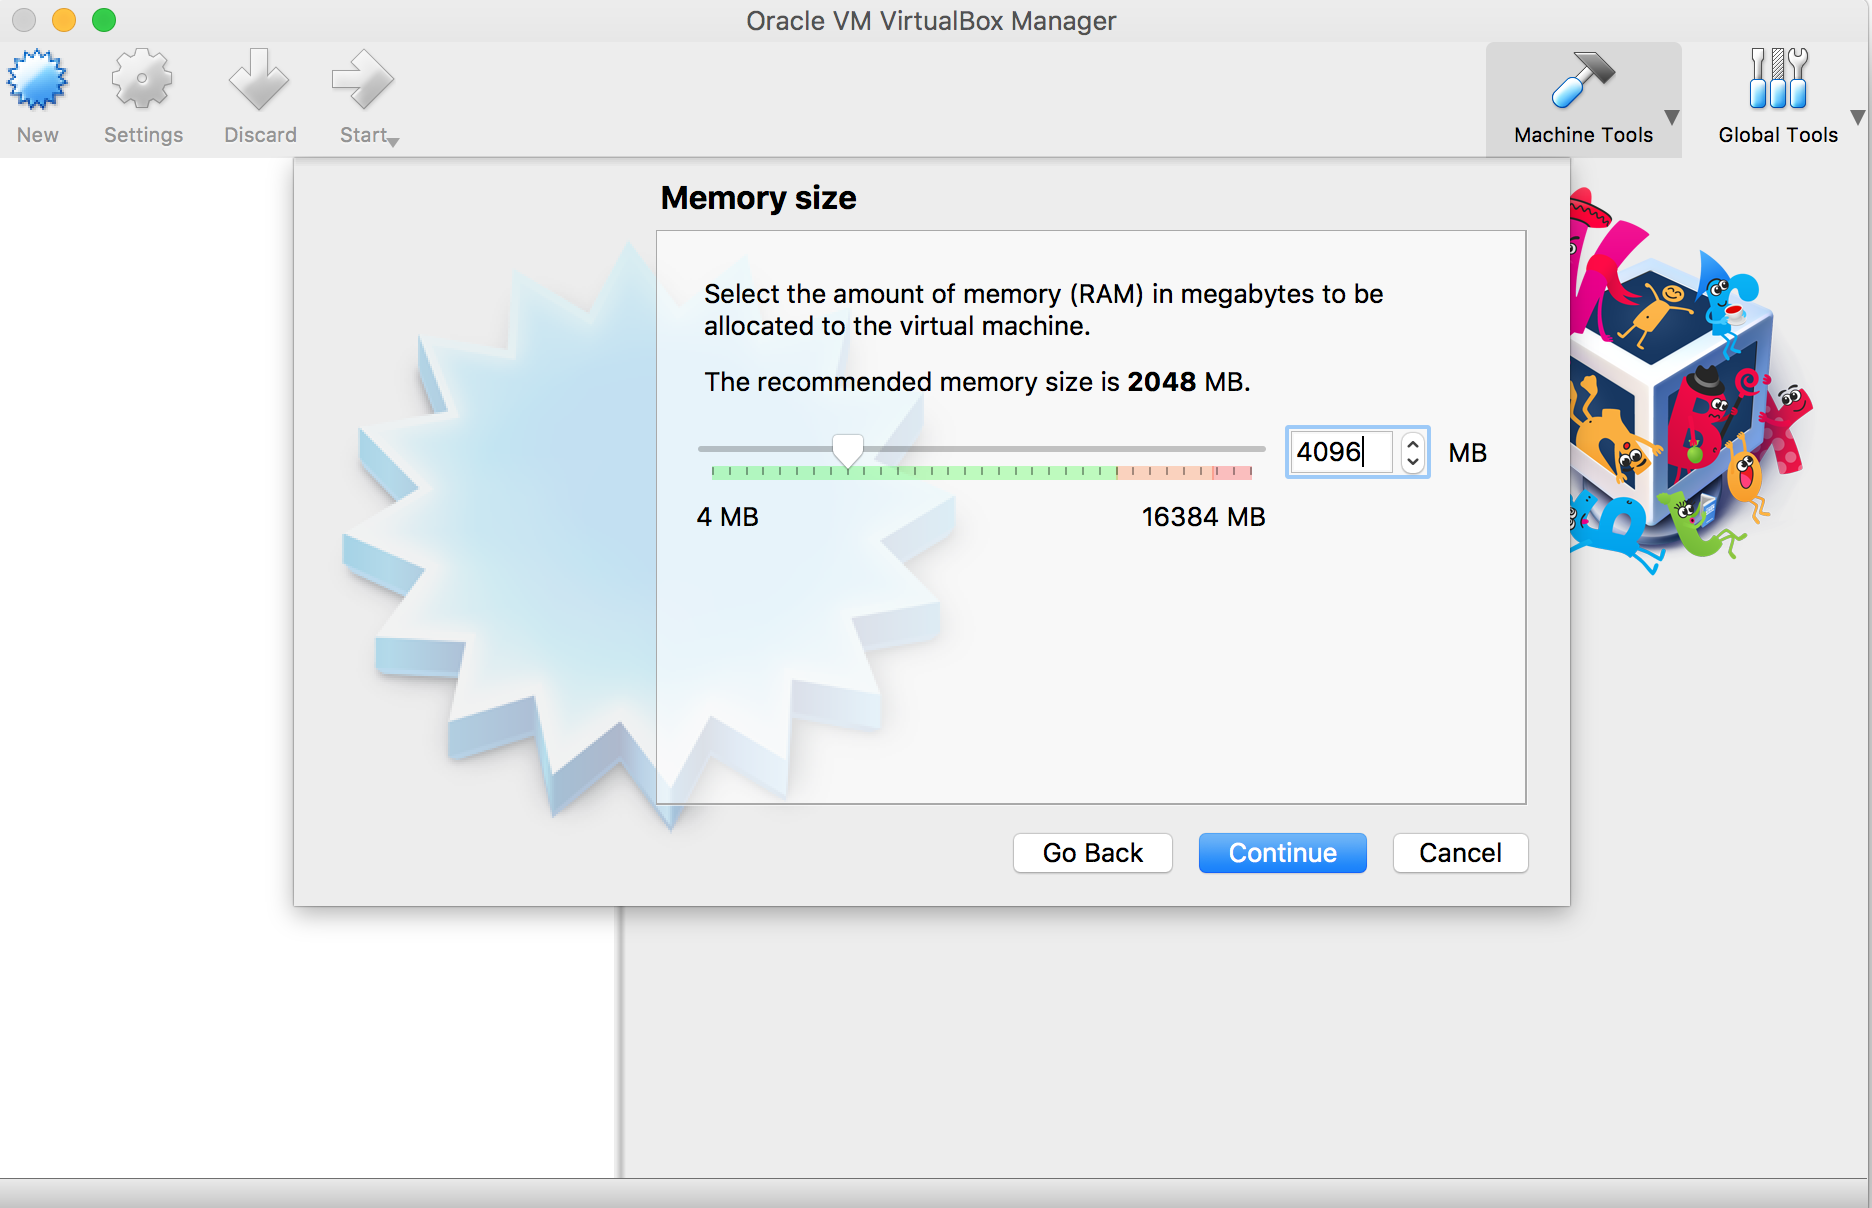
Choose a name, Type is "Mac OS X", and Version is "macOS 10.13 High Sierra (64-bit)". Then click "Continue":
The default memory is 2 GB, I recommend upping it to 4 GB though if you can:
Choose "Create a Virtual Hard Disk File now" and "Create":

For the curious
The image manipulations above, with arrow / blurring of text / etc., were done with the Skitch app. You only need an account to save in Evernote - account-less you can just locally save / export to whatever image file format you prefer.
Quickest Vagrant Tutoral Ever
Add the Vagrant box you want to use. We'll use Ubuntu 12.04 for the following example.

$ vagrant box add precise64 http://files.vagrantup.com/precise64.box
You can find more boxes at Vagrant Cloud

Now create a test directory and cd into the test directory. Then we'll initialize the vagrant machine.

$ vagrant init precise64
Now lets start the machine using the following command.

$ vagrant up
You can ssh into the machine now.

$ vagrant ssh
Halt the vagrant machine now.

$ vagrant halt
Other useful commands are suspend, destroy etc.